Showing posts with label recipes. Show all posts

Monday, March 3, 2014

Easy Weekday Dinner - Fried Rice

Growing up, my mom was a working mom who always managed to get a delicious dinner on the table at the end of the day, something I certainly appreciate more now than I did at the time! One of the go-to meals around our house was fried rice. Now, this isn't meant to be an authentic recipe for fried rice, guys. Certainly you can find that elsewhere on the interwebz. But this is how I was taught to make it, and it turns out pretty tasty, if I do say so myself.

This will be more like a tutorial than a recipe, as I have never measured any of the ingredients and they're all going to be "to taste." But you will need cooked white rice (preferably leftover, or at least refrigerated), an egg, soy sauce, a variety of vegetables, and some meat. Vague, I know, but this is one of those super flexible meals that you can kind of make work with whatever you've got in the fridge.

So first, dice everything into similarly-sized pieces. I usually use what's pictured below: celery, carrots, and ham. We ALWAYS have those on hand, and all my kids like them (in theory).
 Next, take any veggies that need to be cooked, and cook them in a little bit of oil.
Cook your veggies until just tender. Here's where you have two choices. One, just add your rice and ham and move on to the next step. Or, a slightly less healthy, but very delicious option, is to actually fry your rice. First, you add a little more oil to the pan after you cook your veggies. Then pat your rice and meat down into a flat layer and let it fry up a bit on the bottom. I usually let it fry up a bit, then give it a stir, and repeat.
Your rice will start getting a little bit crispy. Don't overdo it though, you just want some crispy bites throughout, not an entire batch of rock-hard rice. Next, make a well in the center of the pan. Crack an egg into a separate bowl and whisk it, then pour it into the well.
Cook the egg in the center gently, as though you're making scrambled eggs.
When your eggs are pretty much cooked through, stir the egg in with the rest of the ingredients.
Add soy sauce to taste (start with a splash or two). If you're going to use green onions, stir them in right at the end here.
We pair this with the potstickers from Costco, for an easy weeknight meal that can be made with whatever you've got! This would be delicious with pork, shrimp, or chicken as well! Fried rice is also a good way for me to get some protein into my picky eater, as he's not much of a fan of meat, but he'll eat some scrambled eggs any day! Give it a try and let me know what your kids think!


Pin It!

Sunday, November 17, 2013

Easy Meatball Pizza Sandwiches

Ready for an easy dinner idea? (We're not going to call this a recipe - my husband would be embarrassed). This is such a great recipe for this time of year - simple, quick, hearty, and warm. And even though these are the easiest thing ever, for some reason this had never occurred to me as a dinner idea until my mother-in-law mentioned it. Thanks, Nancy!

These actually started out as plain meatball sandwiches, but my kids would not eat them until they were re-represented as "pizza sandwiches" with a few harmless meatballs on top. And, turns out, I loved the addition of the pepperoni!

Easy Meatball Pizza Sandwiches
Ingredients:
*Hearty dinner rolls
*Meatballs (homemade or store-bought)
*Spaghetti sauce (homemade or store-bought)
*Provolone cheese
*Italian spice blend
*Pepperoni (optional)

Directions:
Cook meatballs and spaghetti sauce in crockpot or on stovetop. Cut dinner rolls in half, and top one side with pepperoni, and meatballs. Sprinkle with Italian spice blend, and top with Provolone cheese. Broil until rolls are toasted and cheese is nice and melty. I love my bread nice and toasty, so I give it a little pre-broil before adding the ingredients, as shown below.

Yummmm....


Pin It!

Tuesday, April 2, 2013

How-Tuesday: How to Make Marshmallow Fondant


Trust me, I hear you. "I don't liiiiiiiiiike fondant. I had it once and it was so nasty!" Give me a chance and hear me out. While it's true that fondant will never approach the same level of yumminess as frosting, it does have a time and a place. While it takes a little while to get the hang of it, I find it waaaaaaaaay easier for decorating most kids' cake. And this one is made of marshmallows, powdered sugar, and water, so really - how nasty could it be?

For those who are fondant newbies, fondant has a texture very similar Play-Doh, making it easy to use to decorate cakes. It is what most professional cake decorators use to make the amazing creations you see on TV. For years my husband, who was formally a pastry chef, refused to use fondant because of the taste, but once I found this recipe online and he tried it, even he relented.

Here are a few of the cakes we've made using fondant:
 Lego Birthday Party
Disney Princess Birthday Party

The bottom one is one of the first ones we ever did. Now it makes me cringe to look at it, but I wanted to put it on there just to show that even if they don't look that great at first, the more you do it, the more you improve!

So, onto the tutorial.

Easy Marshmallow Fondant
(originally from What's Cooking America)

1 16-oz. bag of mini-marshmallows
1 2-lb. bag of powdered sugar (note: the original recipe says to use name-brand powdered sugar and marshmallows)
2-4 T. water
scoop of Crisco (set aside in a bowl - you will be using this on your hand and the surface, so you don't want to be putting your goopy hands into your tub of Crisco

First, put the marshmallows and 2 T. in a large bowl, and microwave for 30-second intervals, stirring each time, until it is melted (usually 2-3 minutes total). It'll look like this at first:
 Then it'll be melted completely, like this (no, I did not microwave in this metal bowl):
 Dump about 3/4 of the bag of powdered sugar on top
At this point, TAKE OFF ANY JEWELRY, put it in a safe place, and slather your hands with Crisco. As if it were lotion. This is unpleasant, but having sticky marshmallow hands is worse. Mix it up a little until in starts to come together.


 Then grease your countertops with the Crisco, and dump out your fondant. Start kneading, and keep going until it looks smooth. If it starts to get dry and difficult to work with, add a little water. If it feels sticky, add a little more powdered sugar. If the mixture start to stick to your hands or the counter, add a little more Crisco. Keep kneading it for about 5-10 minutes. By the end, you want it to be the consistency of Play-Doh.

If you need to store it for a few days at this point, coat it in Crisco and wrap it up really well with Saran Wrap. Leave it out on the counter - do not refrigerate! When you're ready to use it, you may want to stick it back in the microwave for 10 seconds to make it pliable again. If you're ready to use the fondant right away, let's move on to the next step!

 Now you can add in some color. We use the liquid food color gels that you can pick up at Michael's and even Wal-Mart, I think. I apologize in advance for this picture. It looks like vampire action gone wrong! We are doing red here, and it needed to be red red, not pinkish, so we ended up using almost the whole bottle of gel coloring. Really try to stay away from red and black if at all possible - way more hassle.

So, using a toothpick or fork tines, put some gel on the fondant.


 And then start kneading again to mix it all through.
I did this for approximately 1.5 minutes before I got bored and let my husband finish up this job. When I came back downstairs, it looked like this!
 Note: you can see here that we are using a cutting board to knead the fondant with the dye. We were just nervous because we're in a rental, and we were using red. If you have light countertops, you may want to consider doing the same, especially if you're using reds or pinks, as you don't want it to stain.

To apply it to the cake:
First, you're going to want to make sure your cake is frosted with some buttercream. This is actually a vanilla cake, with chocolate frosting. A few reasons for this. First, most kids will peel off the fondant (ingrates!), and then they still have some yummy frosting underneath. But more importantly, it helps the fondant lay smoother and stick on better when it's going onto a layer of frosting. Make sure the frosting has "crusted" and it's not wet and sticky. So here's the cake. I wouldn't recommend a shape like this for your first try - a basic round is actually easiest.
 Roll out your fondant. You'll want it to be about 1/4" thick. Take some measurements of your cake so that you can be sure your fondant is going to cover the top and sides. You can't really take it off and try it again. Sorry for the blurry "action shot" - I didn't want to ask my husband for the thousandth time to move/stop/slow down so I could take another picture. We sprinkle some powdered sugar down on the counter at this point. You can see it's getting all over the red fondant, but it brushes right off.
 After you have your fondant all rolled out, transfer it to the cake. You can either lift it up with your hands, or roll it around a rolling pin, and then unroll it over the cake. Do not fold it, as it cracks and leaves a crease. There are more pictures of the transferring step on the "What's Cooking America" link above if you need more of a visual.

Pat and smooth the fondant down over the sides of your cake. If you have a little tear, you can use a little bit of water to try and smooth it out, but be really careful you don't gouge the cake with your fingernails - that's a hard repair. See the yellow scraper thing off to the side? That's what we use for smoothing and cutting. If you don't have one, your hands are fine for smoothing, and you can use a knife or pizza cutter for cutting it.
 Here's me cutting off the excess and then sort of tucking the edges under the cake. This is my shot proving I contributed at least a little to the cake construction!

 If you are putting fondant decorations on a fondant cake, like all this stuff on the Pixie Hollow cake, just dip your finger in some water and put a tiny dab on the decoration, then put it on the cake. The water reacts with the sugar to make a bond, and they stick right on.
 Finally, add whatever else you'd like to your cake! When finished, store out on your countertop, or in a baking box. Do NOT refrigerate, as the moisture can ruin the fondant.

We usually do not attempt to create any character figurines out of frosting or fondant. We create a background and then add the toys to the cake (see the Lego minifigures, pixies, and princesses above).

We also try to let our kids add a little something to the cake. In the Lego cake, my son built the "dump truck" bringing over more blocks, and my daughter made the fondant heart in the Pixie Hollow cake and the doorknob(s) for the castle on the princess cake. Sometimes it's hard for me to relinquish control to their vision, but if they have something they'd like to add, I try to always say yes. Since, you know, it is their cake, after all!

Here is the finished product of this Lego cake:
So, give it a try! Make a batch just for fun one day, play with it, let your kids play with it! Roll it out, fashion some shapes, try draping it over a cake pan or shoe box and see how it goes. What you definitely DON'T want to do is to wait until it's party day and you're working with fondant for the first time. Practice, practice, practice, and you'll be creating masterpiece cakes in no time!


I link up here.

Pin It!

Sunday, March 31, 2013

Cadbury Mini Egg Peanut Butter Blondies

 So I realize that Easter dinner has passed and all, and it's a little late for these. I originally thought about setting these to post before Easter of next year, but then I remembered.... clearance Easter candy! So if you end up with a few bags of these after hitting Target's Easter clearance tomorrow, now you've got a plan for them! Well, a plan other than just consuming them for breakfast for the next week. Yuuuuummmmm...........

As family dinners sometimes tend to do, our Easter dinner was increased by about 10 people at the last minute. I needed another dessert, and wanted something I could do with ingredients I already had on hand. I was inspired by these Mini Egg Blondies by Bakeaholic Mama, but wanted something just a little different. I saw a recipe for Peanut Butter Blondies on Allrecipes, tweaked it a little, and came up with these tasty little guys!

Now let's be serious - how can you really go wrong when you start off like this? Cadbury Mini Eggs are my absolute favorite Easter candy. If you've never had these little babies, you really need to give them a try. So let's get started.


Cadbury Mini Egg Peanut Butter Blondies

Ingredients
1 c. butter, softened
1 c. sugar
1 c. brown sugar
2 eggs
1 t. vanilla extract
1 c. chunky peanut butter
2 c. flour
1 t. baking powder
pinch of salt
1 c. Cadbury Mini Eggs, chopped or whole
1 c. semi-sweet chocolate chips

Directions
Preheat oven to 350 degrees. Spray 9x13 pan with cooking spray.

Cream butter and sugars in a mixing bowl.

Add eggs and mix well. Add vanilla and peanut butter.

Mix flour, baking powder, and salt, and add to peanut butter mixture. Top-notch baker note: This is how I "sift" my dry ingredients. Just add the baking powder to the top of the flour and stir it around a little with a teaspoon. Works for me!

Fold in Mini Eggs and chocolate chips. Oh, and by the way? These little buggers are a BEAST to chop! Next time I'm just gonna toss 'em in there whole. They kept on popping off the counter and onto the floor, and I almost had to cry at the waste. So I just ate those guys.

Bake for about 25 minutes until toothpick inserted into the center comes out clean.

Cool, cut, and serve! PS - These babies are rich. Slice small. And then eat a few.
Click up in my menu bar to see where I'm linking up!

Pin It!

Friday, March 29, 2013

Easy Cheesy 5-Ingredient Chicken


Growing up with a working mom, most of our meals were simple but delicious, and this was my all-time fave. I always requested it on my birthday, and continued my love affair into college, where it was an easy go-to meal to make when you had to serve something more legit than Ramen. My siblings and I called my mom for the recipe so many times that we started just calling it "can can cup," since the sauce is two cans of soup and a cup of sour cream. As an adult, I continue to love and make this dish, since it is simple, low-calorie, and kid-friendly. We don't generally use "cream of" soups, but this is one recipe where we make an exception!

Easy Cheesy 5-Ingredient Chicken
1 can cream of chicken soup
1 can cheddar cheese soup
1 c. sour cream
chicken breasts or tenders (enough to fill a 9x13 pan)
6 slices bacon, cooked and crumbled

First, preheat the oven to 350 and grease a 9x13 pan with some cooking spray.

Prepare the sauce by mixing the two cans of soup and the sour cream.


 Place the chicken in the pan and spread the sauce on top.
Bake for 45-60 minutes, depending on the size and starting temp of your chicken (you can put it in still-frozen if you want). Just make sure your chicken is done when you take it out. The sauce does tend to separate a little, especially if you're using light sour cream, so I usually open the oven and give it a little stir once or twice while it's cooking.

Serve over rice and top individual servings with bacon. We also love to serve it with broccoli since the cheese sauce is delicious on this as well!
 
Note: My grandma also makes this in the crockpot, if that's more your style!

Click up in my menu bar to see where I'm linking up!

Pin It!

Monday, March 18, 2013

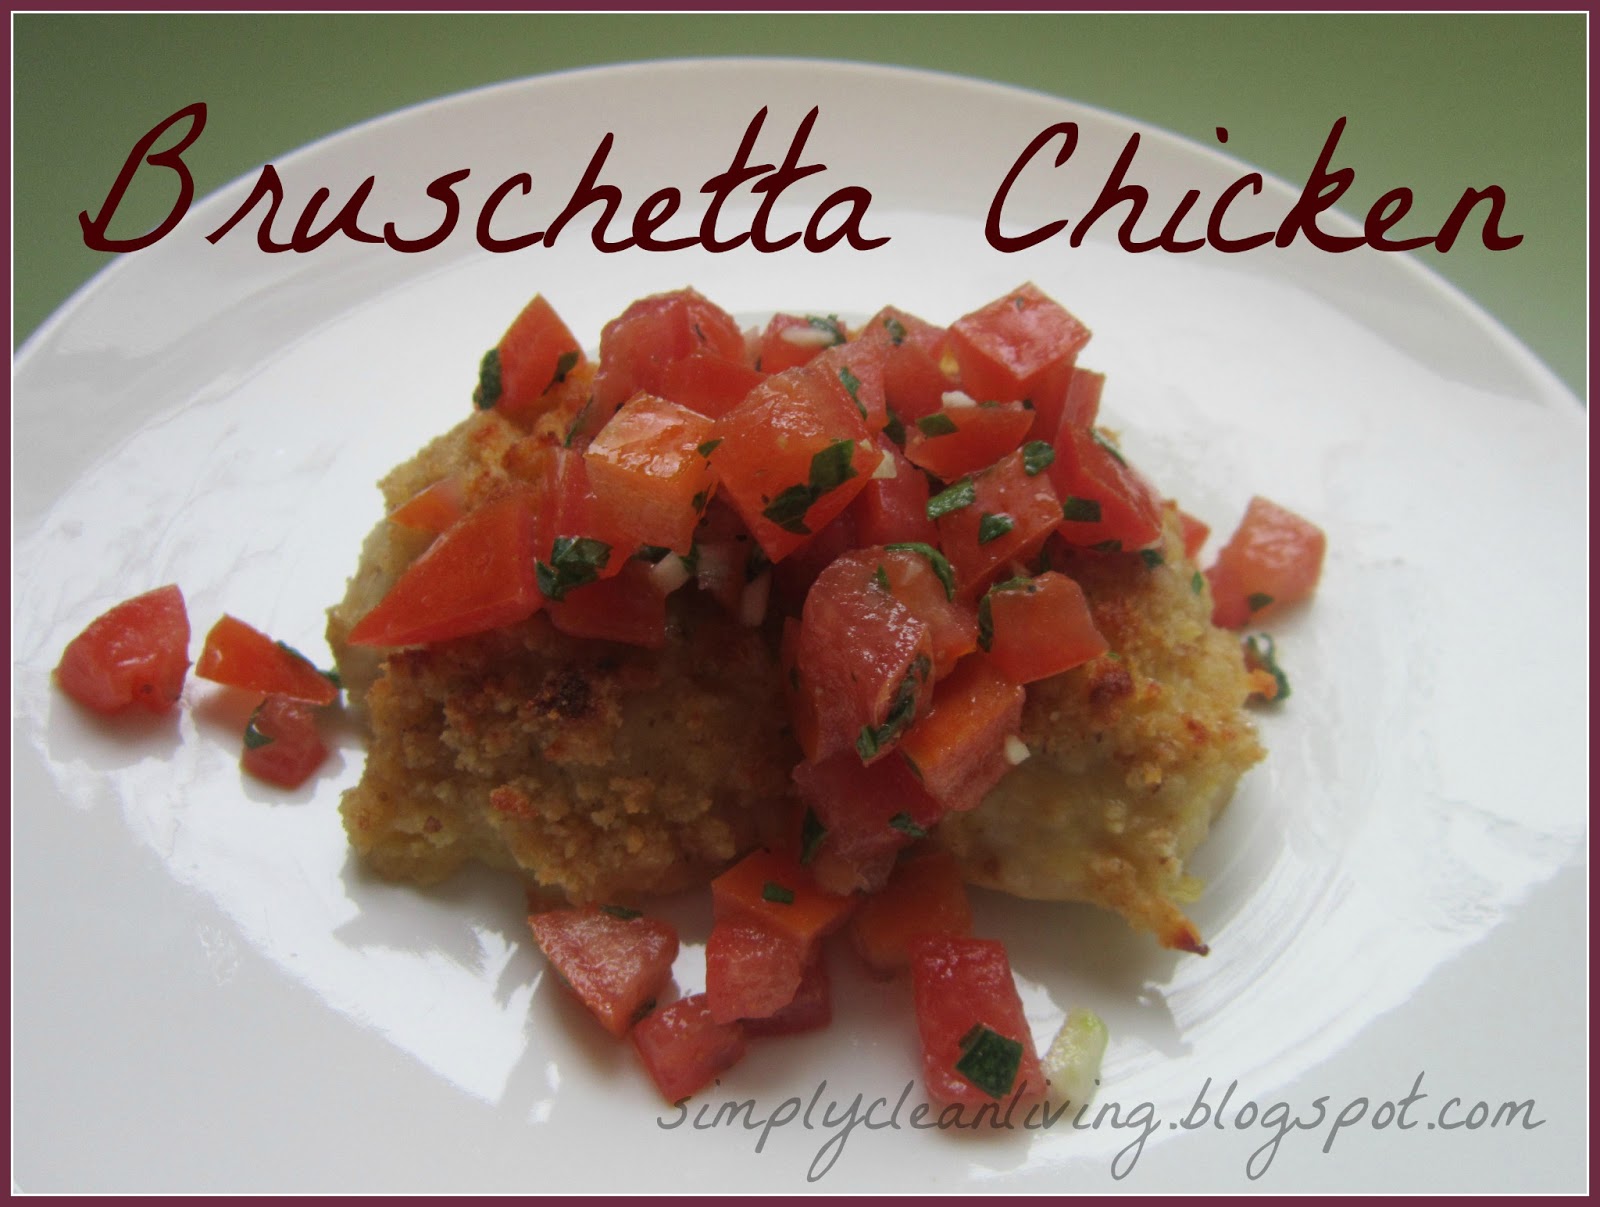
Bruschetta Chicken

Today I'm sharing a favorite recipe that was given to me by a friend many years ago - Bruschetta Chicken. This is a great dish to make for company, since it's delicious, super easy, and looks impressive! When I was fiddling around with this in the kitchen, my husband concocted a balsamic vinegar sauce to go with it, so I've included the recipe for that as well.

Ingredients:
Chicken:
1/2 c. flour
2 eggs, lightly beaten
4 boneless, skinless chicken breasts (approx. 1 lb.)
1/4 c. grated Parmesan cheese (the kind my kids call "shaky cheese")
1/4 c. dry bread crumbs
1 T. butter, melted

Topping:
2 large tomatoes
3 T. minced fresh basil
2 garlic cloves, minced
1 T. olive oil
1/2 t. salt
1/4 t. pepper
*Note: I usually double the ingredients in the bruschetta topping because a love to load excessive amounts of it on my chicken. And eat it with a spoon while I'm waiting for the chicken to cook.

Optional balsamic vinaigrette ingredients: 1/2 c. balsamic vinegar, 1 T. sugar

Preheat your oven to 375. Then, get your topping ready. First, you're going to want to chop your tomatoes and basil. For a tutorial on how to perfectly dice tomatoes, go here.
Aren't those pretty? To easily mince the basil, first remove the stems, then roll leaves and chop.

Mix together the chopped tomatoes, basil, garlic, olive oil, salt, and pepper.
Mmmmmmm.......
Let that sit in the fridge for a bit while you do the rest. Sample with a spoon periodically if you need to. Place flour and eggs in separate shallow bowls. Dip the chicken in flour, then in eggs and place in a greased 13x9 inch baking dish. Be sure to let most of the egg run off, so you don't end up with too much in the baking dish (like I have in the photo below). Combine the Parmesan cheese, bread crumbs, and melted butter, and sprinkle over the chicken.
Loosely cover the baking dish with foil and bake for 20 minutes. Uncover, and bake for 5-15 minutes longer or until top is browned.
Then, spoon the tomato mixture over the chicken and return to the oven for 3-5 minutes or until mixture is warmed through.

Yuuummmmmm......
My husband, who can't leave a recipe well enough alone, also made a balsamic vinaigrette to drizzle on top. For that, take 1/2 c. balsamic vinegar and 1 T. sugar. Simmer on the stove until reduced by half, then drizzle on top of chicken and tomato mixture.
 

Try it out and let me know what you think! Oh, and since I'm a horrible parent and don't make my kids eat what we're eating, we also adapted this by giving it to my picky kids without the tomato topping, and they LOVED it! Like a giant chicken nugget. Ahhh... gourmet cooking for kids....

Pin It!