Wednesday, April 17, 2013

Spirit

I awoke Monday morning to a chime from my phone, an automatic text letting me know that my dad had passed the first checkpoint in the Boston Marathon. The texts kept coming, and though I was physically teaching at an elementary school that day, my mind was thousands of miles away in Boston.

I live far from my family, but I speak with them often and am not usually brought to tears with missing them. However, the earliest hours of my Monday morning saw me blink back more than a few tears as I remembered a weekend three years ago when my siblings and I went to Boston together to cheer on my dad. The spirit of the city that weekend was indescribable: a tangible, joyous celebration of the human body and will. Look at what we can do. Amongst the beautiful architecture and historical sights, we mingled with thousands of runners, with their tell-tale runner's legs and wardrobes, the city buzzing with energy, excitement, vitality, pride.


The day of the race came and we carefully planned our course, where to cheer. We stood by the road, screaming for thousands of unknown runners accomplishing an amazing feat of determination and endurance. In the end, it didn't go as planned. Sometimes, no matter how you train, your body betrays you, and Boston 2010 was one of those days. He walked the final nine miles of the race.

This year as the text updates came in, my heart ached to again be with my siblings, dad, and stepmom, watching my dad finally accomplish his goal - to run a great Boston Marathon. Redemption. My phone buzzed in my pocket. He was finished - right on target, an impressive marathon time of sub-9 minute miles. I sat for a moment, wishing I could throw my arms around him in congratulations, that I could've stood by the side of the road one more time screaming his name.

About a half an hour later I sat down and checked the news online. Explosion at finish line of Boston Marathon, read the breaking news headline. The accompanying news article at that time was one paragraph long. I quickly texted my sister and my stepmom. Though it was a half hour or so before I heard from them, I was only vaguely concerned. I still thought it was a minor electrical explosion of some sort. Initially I had no idea the horrific scope of what had happened, and by the time the news began to trickle in, I already knew. We're okay. We're safe.

Throughout the rest of the day, five minutes here, five minutes there, I read the live feed as the scope of the devastation began to unfold. In tragedies like this there are so many victims in so many ways, big and small. Tragedies both unfathomably huge - loss of life, limb, and innocence, and tragedies small - an unfinished race, hours of panicked uncertainty, an accomplishment tainted. It feels sick and selfish to care about not finishing a race, but a marathon is so much more than a race, and the Boston Marathon so much greater still. Most of these people are just regular people, who challenged their body and mind to do something amazing, and then worked towards that goal for over a year - sacrificing and training month after month for something that, for thousands, ended up just outside their grasp. I feel that small tragedy for you. For those, too, that did finish, robbed of the celebration and victory that this moment should have held. For the community of Boston itself, to have such evil inflicted on something so joyful.

For the joy reflected in this moment, and thousands of others like it, to be overshadowed by loss and heartache.


I had taken my running gear with me Monday morning, intending to go right after work. Tears again stung my eyes as I pulled out my shoes, worn with hundreds of miles. I again tied them up, and felt the ground fall away beneath my feet. One foot in front of the other, praying for Boston every step of the way, for all that was lost - both for what will be rebuilt, and for what will never be recovered. Thinking of the spirit of joy and celebration, for the determination emanating from the city and all it stands for. Look at what we can do. Now let's do some good.


Pin It!

Thursday, April 11, 2013

Lego Birthday Party!


For my son's 6th birthday party, he decided he wanted a Lego party. Well, that's kind of a lie. He actually decided he wanted a Pokemon party, but he doesn't even play with Pokemon, and Legos are his life, so I casually kept pulling up awesome pictures of Lego parties on Pinterest and saying, "Bummer you're not having a Lego party, because this would be awesome." Conveniently, he soon changed his mind!

I've already done a few posts this week about the party, like how I plan birthday parties and how to make marshmallow fondant, so I'll get right to the details!

Decorations/Goody Bags
Thanks to the fabulous Delia at Delia Creates, decorating was super easy. I printed off these sheets of Legos, cut them with a paper cutter, and make some clusters of Legos to tape to the walls.

I always do a portrait wall for my kids' birthdays, so I incorporated the Legos into that as well.
 
And of course, a Lego "6" for the birthday boy! Note his awesome shirt, courtesy of my sister-in-law.

I downloaded the letters for this birthday banner from Big K Little G. I'm so grateful for all these party-planning mommas out there who freely share their talents and make life easier for the rest of us!

I also had my kids make some Lego creations to decorate the piano.

For the goody bags, we again utilized the talents of Delia Creates and made these cute little Lego boxes, which we filled with the Lego candies that can stack together. These candies are actually super fun to play with. I mean, I assume they would be super fun to play with. Of course I wouldn't sit at my kitchen table after bedtime building with candy Legos.


Cake
The cake was inspired by the one on this post, showing a cake that looks like it's being built out of fondant Legos. We decided that was too much work, so we did the Lego part out of the candy Legos we got for the goody bags. Then my son put some mini-figures on there and built a little dump truck to bring more Legos over for the building. That part was his idea and he was so excited to contribute! For more pictures on making the cake, check out the post How-Tuesday: How to Make Marshmallow Fondant.

Games/Activities
At the start of the party, we put out two stations. At one, the kids could just free play with Legos.

The other was an art station, where we let the kids decorate their own Lego guy (printable here) and make a head for Pin the Head on the Lego Guy.


Then we had the kids dip some Jumbo marshmallows to make Lego Guy Marshmallow Pops (idea courtesy of Living Locurto). We had them all ready to go before the party, and stuck in some styrofoam with everyone's initials. Then my husband helped them dip the marshmallows, and then later they drew on the faces themselves with some black frosting.


 These ones are my 3 kids' - a girl with hair, a simple smiley face, and a cat. Love the differences!
For other activities, we played our Pin the Head on the Lego Guy...
...and had a Lego hunt. My son drew 4 pictures of Lego creations, made 3 real Lego creations, and we hid 3 of these little paper guys. The kids loved taking turns hiding and finding these.

Finally, we had a Lego tower-building contest, where they had 5 minutes to build the highest tower they could. No pics of that, unfortunately.

Food
For food, we had my son's favorite, cheese balls. Then cheese and crackers made from Saltines and string cheese, and some other "Legos" made from graham crackers and mini marshmallows, stuck on with Nutella. We also had these darling juice boxes made to look like Lego bricks (juice box printables from Delia Creates).


And that was it! Thanks for reading! Let me know if you have questions about anything - I'd be happy to share more details on how we made and did things!

I link up here.

Thanks again to these blogs for the inspiration and printables!

Party Inspiration
http://sweetbenannasam.com/2012/10/23/free-printable-blank-lego-minifigure/
http://www.karaspartyideas.com/2012/03/lego-themed-5th-birthday-party.html
http://bigklittleg.blogspot.com/2012/05/lego-party-free-printable-banner.html
http://inmyhomeabide.blogspot.com/2011/08/lego-party-for-birthday-boy.html
http://www.deliacreates.com/2011/01/lego-birthday-party.html
http://www.livinglocurto.com/2010/06/lego-cake-pops/
http://zakkalife.blogspot.com/2010/04/lego-kirigami.html

Pin It!

Wednesday, April 10, 2013

WWW: Treat Bins!

What do you do with kids' candy? Just have them eat it immediately? Toss it? Stash it in a drawer? For us, we have treat drawer for each kid. When they get candy at church, a birthday party, holiday, whatever, we toss it in their treat bin. Then, occasionally, we let them open the drawer and choose a piece or two after dinner.
 Here they are picking out a few pieces as we get ready to go see a movie. Apparently my youngest was quite shocked about something!
This system works great for us. The kids can keep "their" candy without worrying about it getting lost or put in some communal drawer, but I make sure they're eating it in amounts and times that work for us. How do other parents handle the candy issue? Any other awesome ideas?

Pin It!

Tuesday, April 9, 2013

How-Tuesday: How to Plan and Organize a Birthday Party!

For this week's edition of How-Tuesday, I thought I'd share with you how I plan and organize for my kids' birthday parties. Because of the cost factor, we always do our kids' parties at home. I try really hard to create a party for them that is unforgettable and exciting, yet doesn't cost too much money. This usually involves a lot of time and creativity, and staying on top of everything is key so that I don't go too crazy!

A Few Weeks Ahead of Time
First, I have my kid decide on a theme. Then, we decide how many kids we'll be inviting. This drives everything else for the party, since some things are way more chaotic and/or costly when you're talking about 10 friends versus 3. Then, obviously, I turn to the good old internet for ideas, particularly Pinterest. I actually have a dedicated board for my kids' upcoming parties, where I pin things for specific themes, or just things I think they would like someday.

Then, I take a paper and divide it into sections. For all my love of technology, I still do my lists with good old pencil and paper. Nothing beats it! One section for the cake, one for decorations/goody bags, one for games/activities, and one for food. As I come across ideas I like, I jot them down.
After deciding which ones are do-able based on time and resources, I first run them by my husband, and he brings me back to earth and reasons with me and gives input on the ones he thinks are actually do-able. Then, once we've decided what we're willing to do, we go over it with the birthday kiddo to see which things they would be most interested in. There's no point in planning something your kid won't enjoy, no matter how cool you think it is. Parties are a team effort around here! I also try to get their input here for things they would like to help with, design, or make, so that they've got a hand in creating the magic as well! At this point, I create a shopping list of things that need to be purchased before the party, so we can grab things over the coming weeks when we go to Target or the grocery store. Also, order anything online that you need at this point.

We usually keep a laundry basket or corner of the house as a central location to toss things as we buy them, so that we're not running around the day before going, "WHERE did you put those stickers I bought for the goody bags? I KNOW I bought plastic forks! Did they disappear??!"


The Week Before
Then, as the weekend of the party approaches, I make a giant to-do list, writing out every single thing I can think of that needs to be done for the party. Then I figure out which day to do it, so that I don't end up too swamped on the day of the party. I can easily look through to see if I'm on track and getting everything done that needs doing! The week before the party is usually buying any last-minute things, making decorations, etc.


The Day Before
We usually do the cake the day before the party. That's a huge thing in our house, so I don't like to save that stress for the day of. At this point, I finish making or buying everything. I try not to leave very much for the day of the party other than cleaning and decorating.

Also, usually the day before the party, I write out a schedule. This is a little over the top, I realize, but it's not as if I'm out there with a whistle screaming, "Move on! Next activity! Hustle! Hustle!" It's more just to help me gauge how much time I should allot for everything in order to fit it all in. I don't live and die by the schedule, but it just helps me to keep an eye on things so that we don't run out of time at the end. I find it usually works to divide your party up into about 20-minute increments. Very few things we do take longer than this. I also have a few ideas, either in my head or on the schedule, of "filler" activities we could do if we end up with extra time.
 I always start with some sort of low-key craft or coloring thing that the kids can work on as they arrive, and try to switch off doing games and other things.

The Day Of
On the day of the party, we decorate, clean up the downstairs, put out the food, get giant Diet Cokes from the gas station, and enjoy the party!

Pin It!

Friday, April 5, 2013

How to Speak Kid: Sweet and Sour


This post is part of a series called "How to Speak Kid," about how to talk to your kids so that they'll (hopefully) listen, do what you ask, and grow up to be pretty cool people while they're at it. I'm not promising magic, but hopefully it'll give you some new tools for your parenting toolbox. As a mother of 3 and a full-time teacher, I'm always on the lookout myself for new ways to manage behavior and understand kids!

Today's Tip: Ask your kids about the "sweet" and "sour" of their day to hear more about what's important to them.

There's a great quote by Catherine Wallace that you've probably heard: If you don't listen eagerly to the little stuff when they are little, they won't tell you the big stuff when they are big, because to them all of it has always been big stuff.

I once read a tip that I really liked about talking to your kids about their day. It said to ask them every day for a "sweet" and a "sour." A sweet, of course, is something good that happened to them during the day, something that made them happy. A sour, on the other hand, is something that made them feel hurt, sad, or upset.

I find this to be more effective than asking, "How was your day?" or, "What did you learn at school?" It's interesting to hear the little things that make them happy, and also the types of things that they view as negative in their day. 

Give it a try!


Other posts about How to Speak Kid:


Pin It!

Tuesday, April 2, 2013

How-Tuesday: How to Make Marshmallow Fondant


Trust me, I hear you. "I don't liiiiiiiiiike fondant. I had it once and it was so nasty!" Give me a chance and hear me out. While it's true that fondant will never approach the same level of yumminess as frosting, it does have a time and a place. While it takes a little while to get the hang of it, I find it waaaaaaaaay easier for decorating most kids' cake. And this one is made of marshmallows, powdered sugar, and water, so really - how nasty could it be?

For those who are fondant newbies, fondant has a texture very similar Play-Doh, making it easy to use to decorate cakes. It is what most professional cake decorators use to make the amazing creations you see on TV. For years my husband, who was formally a pastry chef, refused to use fondant because of the taste, but once I found this recipe online and he tried it, even he relented.

Here are a few of the cakes we've made using fondant:
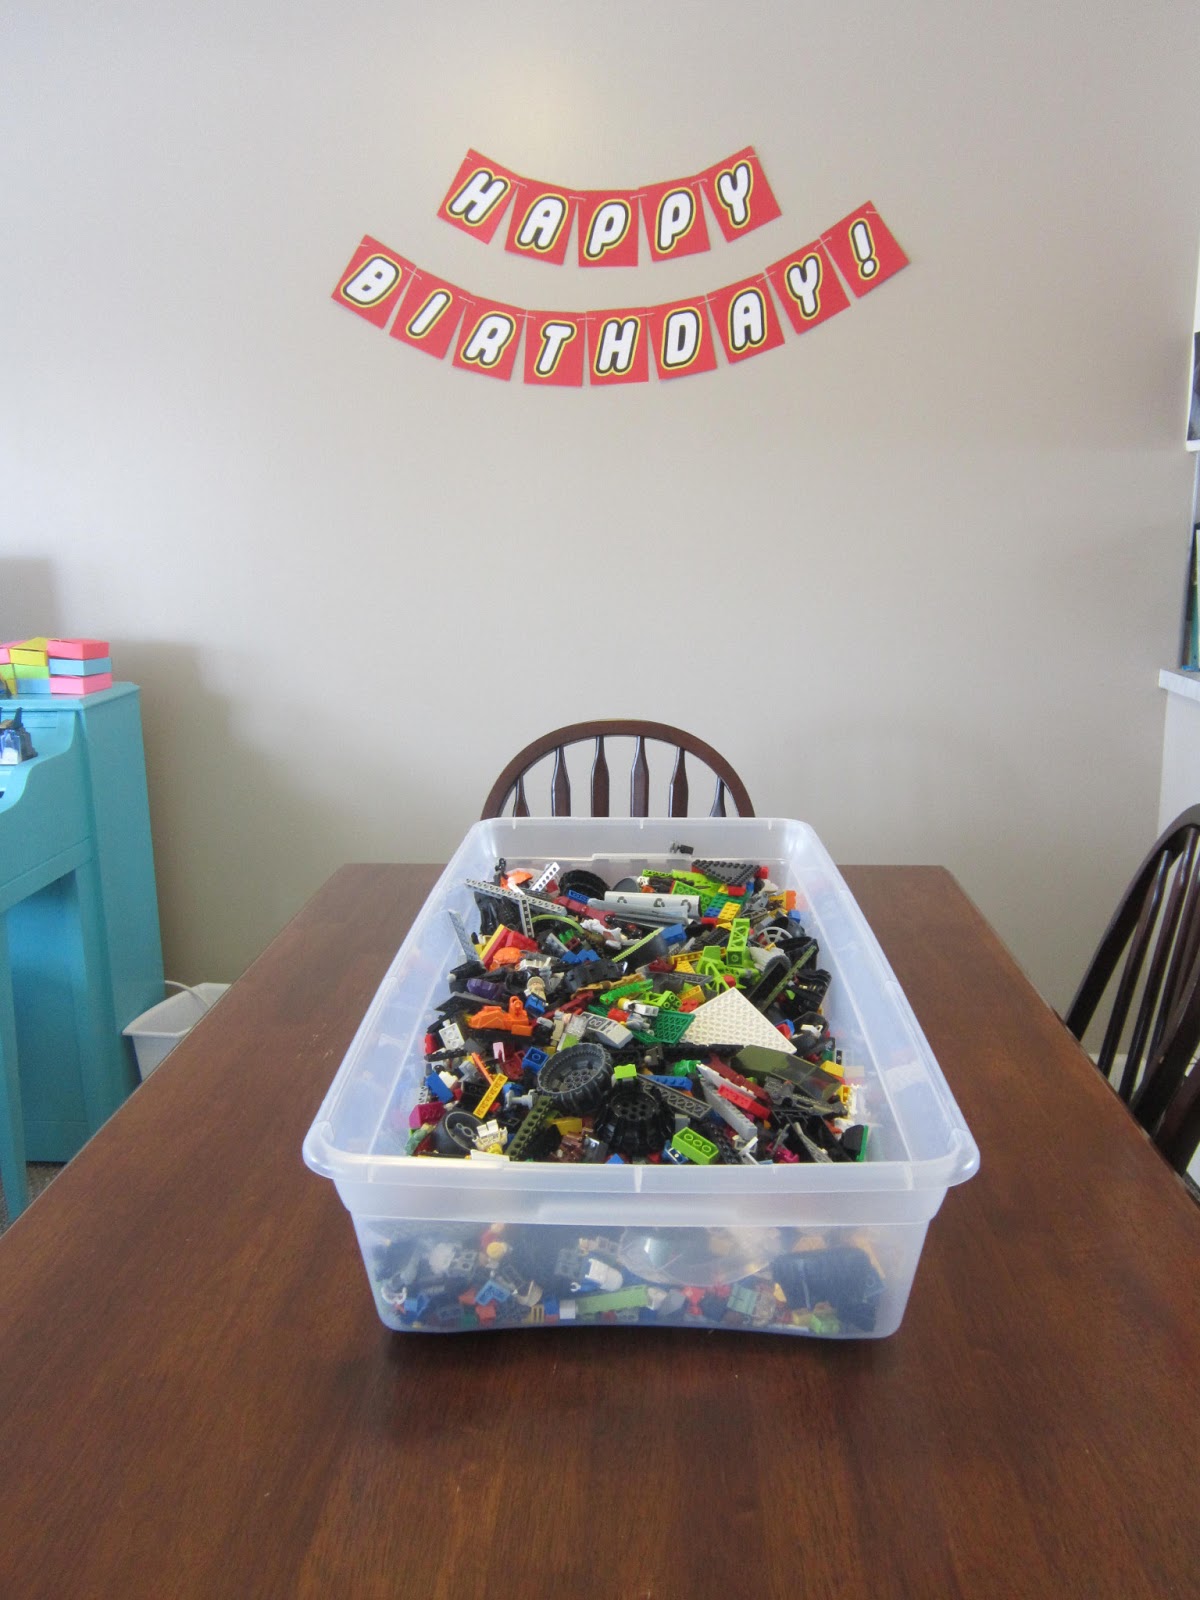
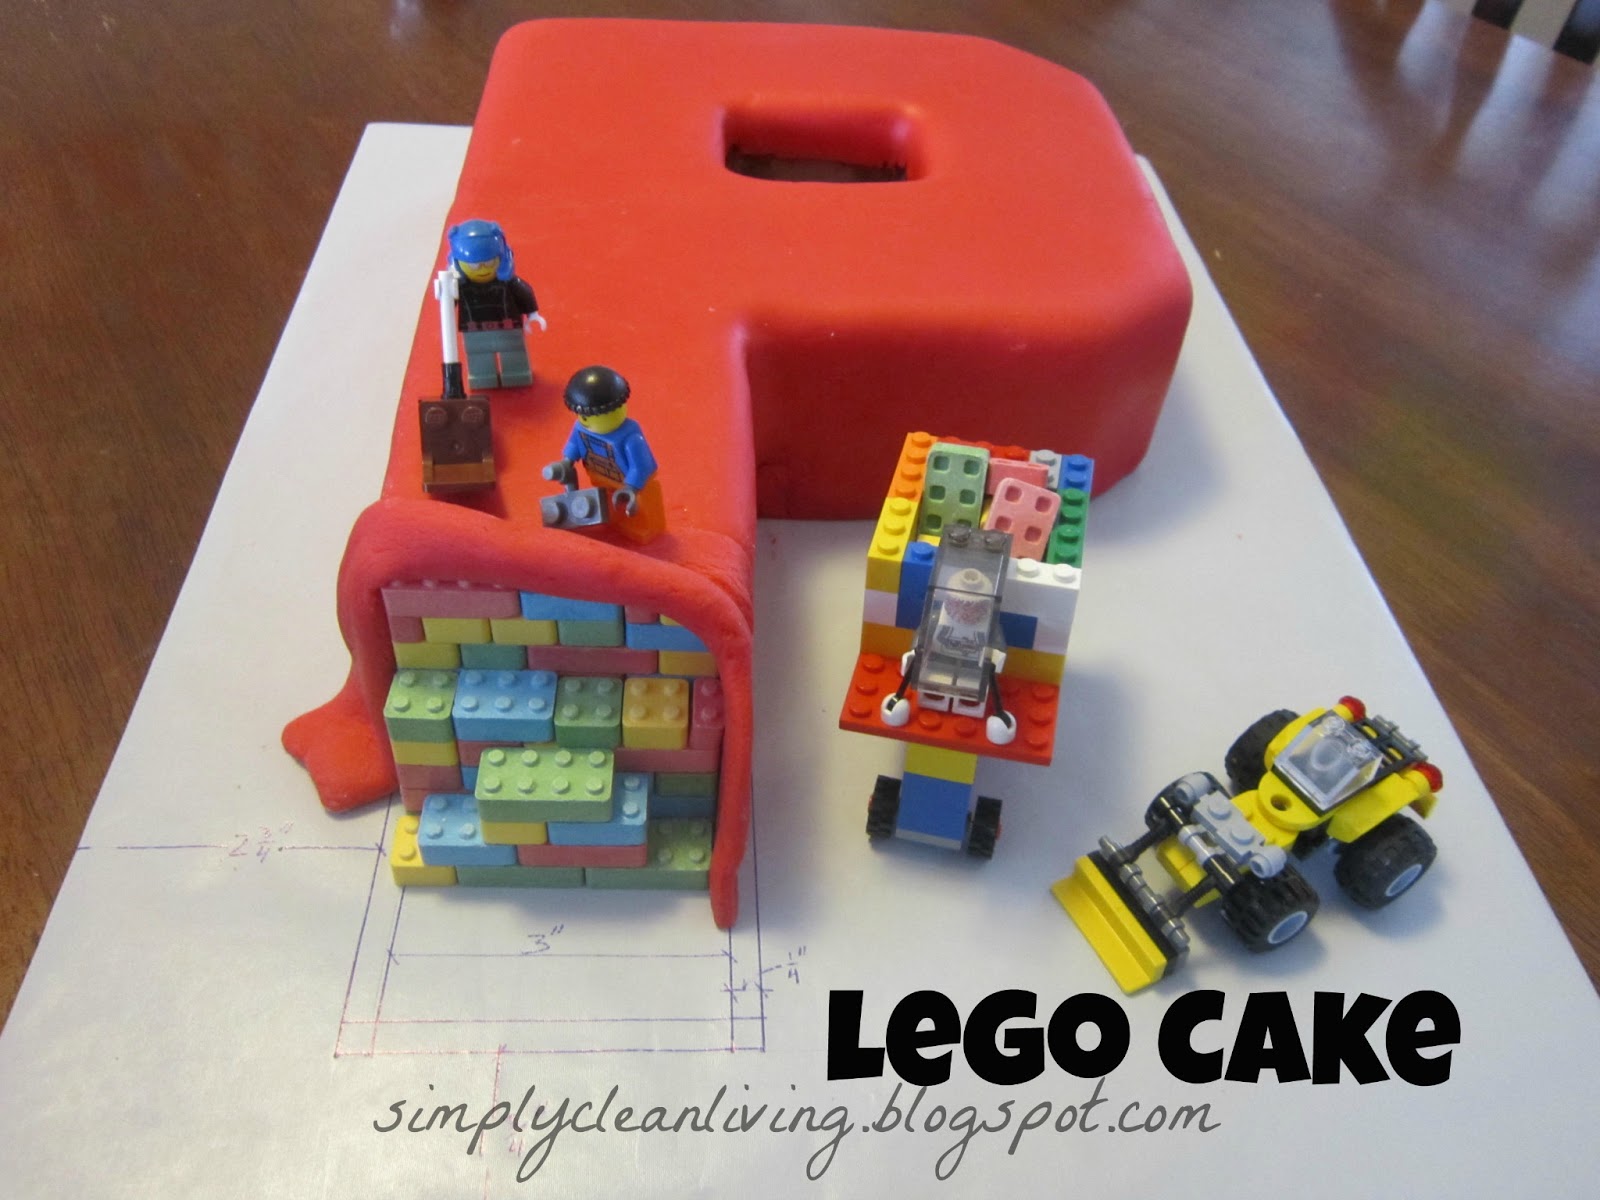
 Lego Birthday Party
Disney Princess Birthday Party

The bottom one is one of the first ones we ever did. Now it makes me cringe to look at it, but I wanted to put it on there just to show that even if they don't look that great at first, the more you do it, the more you improve!

So, onto the tutorial.

Easy Marshmallow Fondant
(originally from What's Cooking America)

1 16-oz. bag of mini-marshmallows
1 2-lb. bag of powdered sugar (note: the original recipe says to use name-brand powdered sugar and marshmallows)
2-4 T. water
scoop of Crisco (set aside in a bowl - you will be using this on your hand and the surface, so you don't want to be putting your goopy hands into your tub of Crisco

First, put the marshmallows and 2 T. in a large bowl, and microwave for 30-second intervals, stirring each time, until it is melted (usually 2-3 minutes total). It'll look like this at first:
 Then it'll be melted completely, like this (no, I did not microwave in this metal bowl):
 Dump about 3/4 of the bag of powdered sugar on top
At this point, TAKE OFF ANY JEWELRY, put it in a safe place, and slather your hands with Crisco. As if it were lotion. This is unpleasant, but having sticky marshmallow hands is worse. Mix it up a little until in starts to come together.


 Then grease your countertops with the Crisco, and dump out your fondant. Start kneading, and keep going until it looks smooth. If it starts to get dry and difficult to work with, add a little water. If it feels sticky, add a little more powdered sugar. If the mixture start to stick to your hands or the counter, add a little more Crisco. Keep kneading it for about 5-10 minutes. By the end, you want it to be the consistency of Play-Doh.

If you need to store it for a few days at this point, coat it in Crisco and wrap it up really well with Saran Wrap. Leave it out on the counter - do not refrigerate! When you're ready to use it, you may want to stick it back in the microwave for 10 seconds to make it pliable again. If you're ready to use the fondant right away, let's move on to the next step!

 Now you can add in some color. We use the liquid food color gels that you can pick up at Michael's and even Wal-Mart, I think. I apologize in advance for this picture. It looks like vampire action gone wrong! We are doing red here, and it needed to be red red, not pinkish, so we ended up using almost the whole bottle of gel coloring. Really try to stay away from red and black if at all possible - way more hassle.

So, using a toothpick or fork tines, put some gel on the fondant.


 And then start kneading again to mix it all through.
I did this for approximately 1.5 minutes before I got bored and let my husband finish up this job. When I came back downstairs, it looked like this!
 Note: you can see here that we are using a cutting board to knead the fondant with the dye. We were just nervous because we're in a rental, and we were using red. If you have light countertops, you may want to consider doing the same, especially if you're using reds or pinks, as you don't want it to stain.

To apply it to the cake:
First, you're going to want to make sure your cake is frosted with some buttercream. This is actually a vanilla cake, with chocolate frosting. A few reasons for this. First, most kids will peel off the fondant (ingrates!), and then they still have some yummy frosting underneath. But more importantly, it helps the fondant lay smoother and stick on better when it's going onto a layer of frosting. Make sure the frosting has "crusted" and it's not wet and sticky. So here's the cake. I wouldn't recommend a shape like this for your first try - a basic round is actually easiest.
 Roll out your fondant. You'll want it to be about 1/4" thick. Take some measurements of your cake so that you can be sure your fondant is going to cover the top and sides. You can't really take it off and try it again. Sorry for the blurry "action shot" - I didn't want to ask my husband for the thousandth time to move/stop/slow down so I could take another picture. We sprinkle some powdered sugar down on the counter at this point. You can see it's getting all over the red fondant, but it brushes right off.
 After you have your fondant all rolled out, transfer it to the cake. You can either lift it up with your hands, or roll it around a rolling pin, and then unroll it over the cake. Do not fold it, as it cracks and leaves a crease. There are more pictures of the transferring step on the "What's Cooking America" link above if you need more of a visual.

Pat and smooth the fondant down over the sides of your cake. If you have a little tear, you can use a little bit of water to try and smooth it out, but be really careful you don't gouge the cake with your fingernails - that's a hard repair. See the yellow scraper thing off to the side? That's what we use for smoothing and cutting. If you don't have one, your hands are fine for smoothing, and you can use a knife or pizza cutter for cutting it.
 Here's me cutting off the excess and then sort of tucking the edges under the cake. This is my shot proving I contributed at least a little to the cake construction!

 If you are putting fondant decorations on a fondant cake, like all this stuff on the Pixie Hollow cake, just dip your finger in some water and put a tiny dab on the decoration, then put it on the cake. The water reacts with the sugar to make a bond, and they stick right on.
 Finally, add whatever else you'd like to your cake! When finished, store out on your countertop, or in a baking box. Do NOT refrigerate, as the moisture can ruin the fondant.

We usually do not attempt to create any character figurines out of frosting or fondant. We create a background and then add the toys to the cake (see the Lego minifigures, pixies, and princesses above).

We also try to let our kids add a little something to the cake. In the Lego cake, my son built the "dump truck" bringing over more blocks, and my daughter made the fondant heart in the Pixie Hollow cake and the doorknob(s) for the castle on the princess cake. Sometimes it's hard for me to relinquish control to their vision, but if they have something they'd like to add, I try to always say yes. Since, you know, it is their cake, after all!

Here is the finished product of this Lego cake:
So, give it a try! Make a batch just for fun one day, play with it, let your kids play with it! Roll it out, fashion some shapes, try draping it over a cake pan or shoe box and see how it goes. What you definitely DON'T want to do is to wait until it's party day and you're working with fondant for the first time. Practice, practice, practice, and you'll be creating masterpiece cakes in no time!


I link up here.

Pin It!