Friday, December 27, 2013

Product Review: Jillian Michaels Body Revolution vs. Insanity

I know that many of us (myself included), make fitness-related goals around this time of year! I wanted to share a review for a product I've been using, Jillian Michaels Body Revolution, and compare it to the Insanity workout, which we did last year. This post was in no way sponsored by either company - I just wanted to share my experiences!
Images Via

Background
Body Revolution and Insanity are both multi-disk programs designed to last several months, which focus mainly on strength training, but also some cardio. Body Revolution is currently on Amazon for $90, and comes with 15 disks, while Insanity is $145 for 10 disks, and both have 4.5 star ratings on Amazon. They each come with an eating plan, which I did not follow for either program, so I won't comment on that part here. I believe both are designed for people who already have a moderate level of fitness and want to focus on toning - I would not consider either of these to be programs for beginners. If you're looking for a good beginner's program, I would highly recommend Jillian Michaels' 30-Day Shred.

Difficulty Level
Body Revolution starts out easy, and gets progressively more difficult. In fact, the first few DVDs of Body Revolution seemed downright simple. It wasn't until the day after when I could feel the burn! It was really easy for me to get in a routine and stay motivated when the initial routines weren't too challenging, but felt effective at the same time. Every two weeks you move up a level and the exercises get more difficult. I am currently on disks 9 & 10 and the workouts are HARD.

Insanity had me struggling from Day 1. In fact, my daughter walked in while my husband and I were suffering through the first day and remarked, "Um, I think this workout might be too hard for you guys." I work out fairly regularly, and consider myself to be in pretty good shape, so I thought I would be fine. For me, Insanity was hard to stick with because it was so difficult, and I ended up giving up eventually. I think I lasted about 4 weeks.

Length
Body Revolution - 30 minutes each
Insanity - 30-80 minutes each

Results and Final Opinions
While the built-in fitness test with Insanity helped prove that I was getting more and more fit, I didn't really stick with it long enough to see noticeable results. With Body Revolution, I did not see a significant amount of weight loss. Part of this, I believe, was due to the fact that I was not adjusting my eating in an attempt to lose weight, and part of it was because I was gaining muscle mass. However, I did take measurements before I started the program, and a month into it, and I had lost a cumulative FIVE inches off my thighs, hips, and waist! I could also see noticeable definition in my arms, stomach, and booty.

While I know there are many people who are true devotees to Insanity and other Beachbody products, to me the time commitment and intensity level did not suit my lifestyle. On the other hand, with a quick 30 minutes at a time and so many DVDs to choose from, I can see myself continuing to use the Body Revolution videos for many years to come.

Bottom Line
Bite the bullet - the $100 for Body Revolution is totally worth it!

Pin It!

Sunday, November 17, 2013

Easy Meatball Pizza Sandwiches

Ready for an easy dinner idea? (We're not going to call this a recipe - my husband would be embarrassed). This is such a great recipe for this time of year - simple, quick, hearty, and warm. And even though these are the easiest thing ever, for some reason this had never occurred to me as a dinner idea until my mother-in-law mentioned it. Thanks, Nancy!

These actually started out as plain meatball sandwiches, but my kids would not eat them until they were re-represented as "pizza sandwiches" with a few harmless meatballs on top. And, turns out, I loved the addition of the pepperoni!

Easy Meatball Pizza Sandwiches
Ingredients:
*Hearty dinner rolls
*Meatballs (homemade or store-bought)
*Spaghetti sauce (homemade or store-bought)
*Provolone cheese
*Italian spice blend
*Pepperoni (optional)

Directions:
Cook meatballs and spaghetti sauce in crockpot or on stovetop. Cut dinner rolls in half, and top one side with pepperoni, and meatballs. Sprinkle with Italian spice blend, and top with Provolone cheese. Broil until rolls are toasted and cheese is nice and melty. I love my bread nice and toasty, so I give it a little pre-broil before adding the ingredients, as shown below.

Yummmm....


Pin It!

Thursday, November 7, 2013

If You Could Change One Thing....

While I'm not accepting the challenge to blog daily for NaBloPoMo, I am trying to blog more often for the month of November, and I was intrigued by their post prompt yesterday. If you could change one thing about yourself, what would it be?

The answer came easily to me. If I could change one thing about my personality, I would love to have the gift of making conversation. 


I am doubly challenged by this seemingly-perplexing concept. On one hand, getting to know new people is next to impossible for me. If I didn't have a friend to go with, I would be way more likely to stay home from an event than go and make conversation with people I don't know. It's not that I don't like making friends, it's that I literally CANNOT think of what to say to people before I know them well. I am horrible at making small talk. I can't think of a good way to open the conversation, I can't keep a conversation going, I live in fear of awkward pauses. Meeting new people is terrifying to me.

Then... it gets worse. I meet people. I get comfortable. And then I can't shut up! I tend to dominate conversations, talking loudly, telling stories, and just generally getting all wound up. I thrive on the energy and laughter of the group, and get more and more animated, and more and more talkative. When I come down from my "high," usually after I've left, I kick myself for how obnoxious I've been and how much I talked about myself. Really, the art of making conversation is not one that I've mastered.

*sigh*

I have two aunts who are beautiful and gracious conversationalists. When they meet new people, they ask all the right questions to get to know them, and to make the person feel comfortable. They always manage to strike that balance between asking and sharing, and make each person they talk to feel special and valued. It's such an amazing gift, in my opinion, and one I would love to someday cultivate.

But for now, luckily, somehow I manage to make friends, and somehow, once I have them, I manage to keep them. Despite the fact that they've heard the story three dozen times already about when I broke that one girl's nose at Color Guard practice. Heh. 

Pin It!

Monday, November 4, 2013

10 Gift Ideas for the Little Lego Lover


My son is OBSESSED with Legos, but sometimes it seems like you can only buy so many sets, know what I mean? On a recent trip to Costco, I wanted our trip to seem more legit than just going to eat at the food court, so we walked around browsing, and they had some great books that caught my eye. I thought I'd pass along the ideas, along with a few more, for anyone else thinking ahead to the holidays!

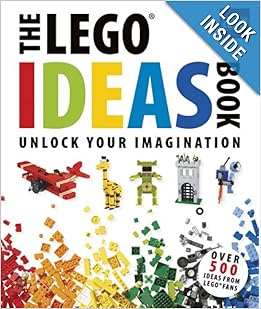
1. I posted last year on Facebook that we had gotten this Lego Ideas Book for our son's birthday.


This is NOT a book with instructions. Instead, it is a large, coffee table-style book filled with Lego creations organized by theme. It gives ideas on different ways to use specialty bits and bricks they may have gotten in other sets. It also has interesting interviews with people who build Legos professionally. My son still spends hours thumbing through this book, and even has us read pages for his nightly bedtime story. "Be creative with your bricks! You can use different bricks to achieve the same effects. If you don't have green cabbages for your farm truck, but you have yellow bricks, you have hay bales!" Zzzzzzz for me.... !!excitement!! for him.

Other books I saw at Costco.... We don't own these so I can't speak to how loved they might be, but all three of my kids were clamoring for these at the store!

2. Lego Minifigure Year by Year


3. Lego Play Book: Ideas to Bring Your Bricks to Life


4. The Lego Book


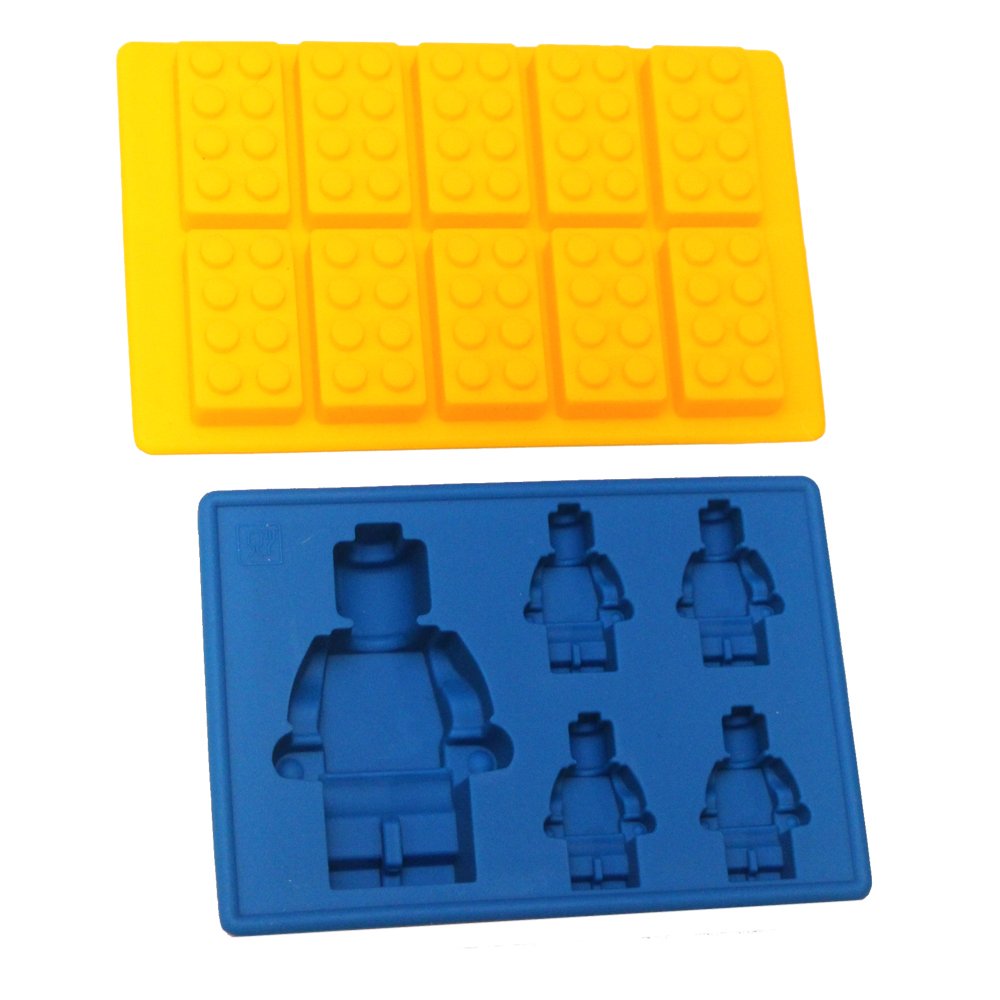
5. Building Brick and Minifigure Ice Cube Tray/Candy Melt
While we didn't use these for our Lego Birthday Party, lots of other parties I saw online did! How fun would these be to make ice cubes, candy, crayons, and more!? My kids would love these!
Photo credit: amazon.com

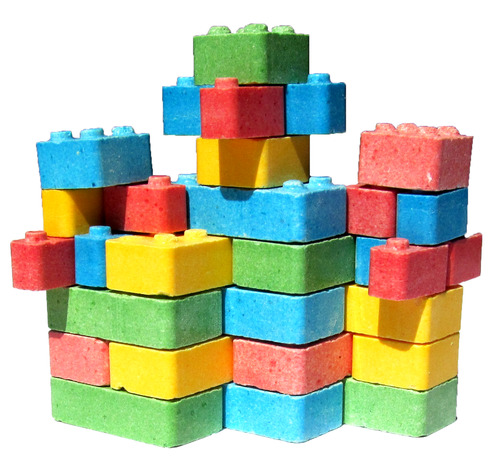
6. Lego Candy
photo credit: amazon.com
As seen in the cake we made for Parker's Lego party, these Lego brick candies actually stick together! My husband and I may or may not have stayed up playing with these little guys. Fun and tasty, they would make a great stocking stuffer!

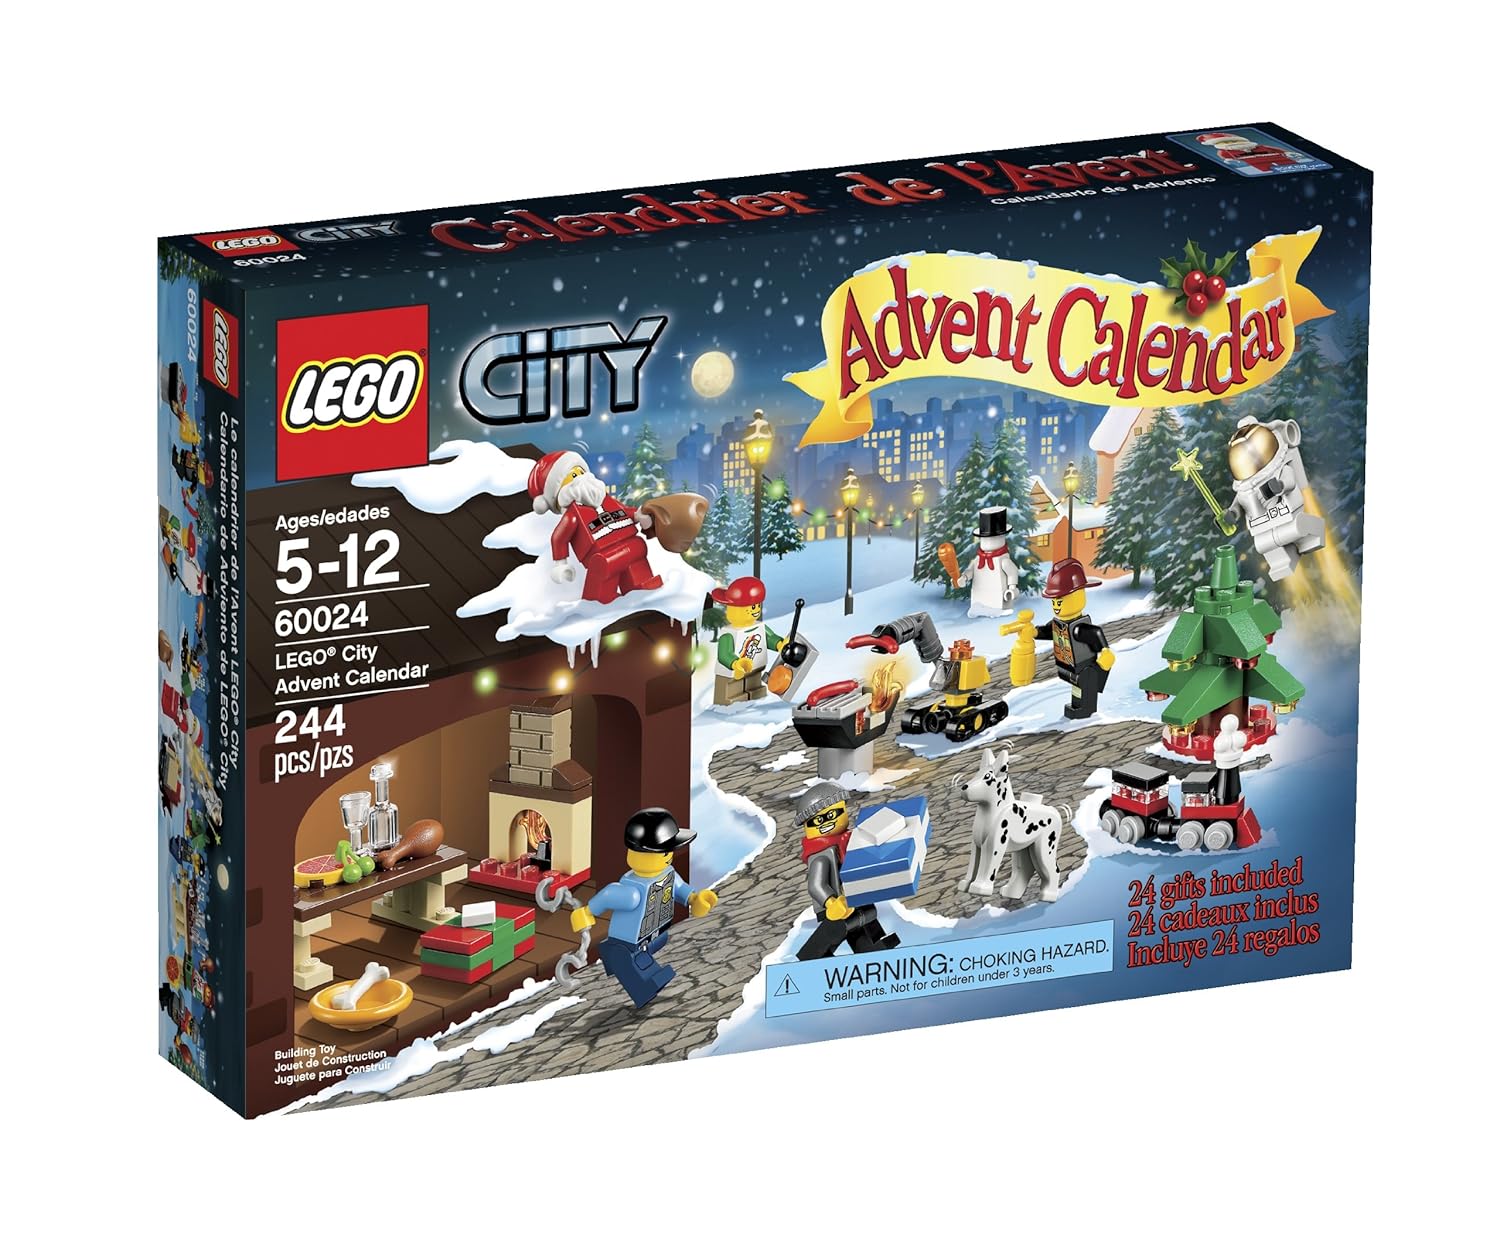
7. Lego Advent Calendar

I have always wanted to get one of these for my kids, but I never have. I'm tempted every year, though! Maybe 2013 is the year.

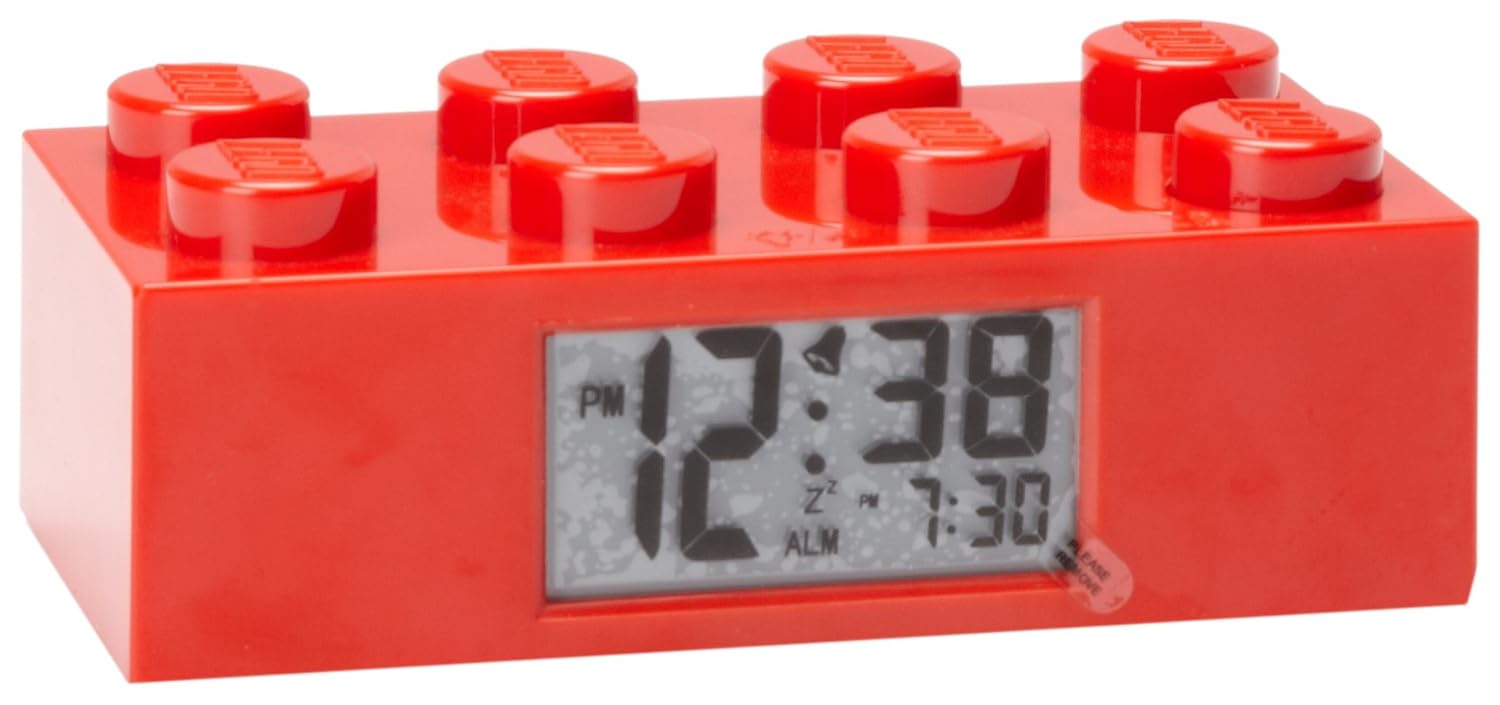
8. Lego Alarm Clock

Maybe if I got this for my son, he would actually be willing to get up for school! Nah, doubt it.

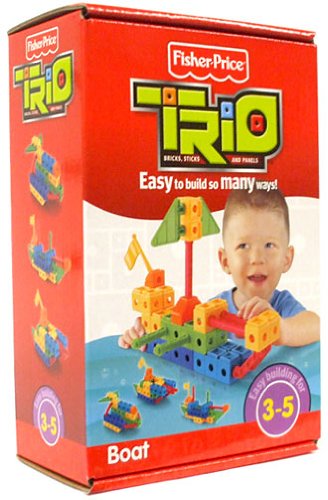
9. Trio Blocks
photo credit: amazon.com
Okay, I know these look kind of "young" compared to what Lego guys might normally be into. And it's true that we started buying these for my son when he was probably 2 years old. However, these are still a building favorite with my crew and their cousins (ages 4-11). They create all sorts of buildings, vehicles, animals, and bugs. We actually keep a tub of these over at Grandma's house because it can entertain the 6 kids & cousins endlessly, and they're much easier to clean up.

10. Giant bag of Peanut Butter M&M's
These have nothing to do with Legos. But, um, hello? Who would not want to be the recipient of a giant bag of the best M&M's on the planet? Does anyone have me on their Christmas list this year?

I'd love to hear any other reader ideas on what to get for a kid who loves Legos!

Pin It!

Tuesday, October 29, 2013

Costume Run!

One thing I really love about Alaska is how active and family-oriented it is. In the fall, there is a race series held on Tuesday nights, and tonight it was a Costume Run. The run for the kids was about a mile, and they had trick-or-treat stations about every quarter mile.

Of course, I had to make things extra chaotic by not deciding that I wanted to go until like an hour before it started, then frantically trying to find warm costumes for my kids, all while my youngest was crying her eyes out from skinning her knees and our landlord was upstairs doing some repair work. Uh, don't mind your crazy, loud tenants down here, mister!

My son just chose to throw his hockey stuff on (since we were ditching practice anyway, it was already all laid out), and my daughter wore all black with these little kitty ears. Don't worry, she felt that 40 degrees was about the perfect temp to run in a long-sleeved tee shirt and yoga pants, so she ditched this perfectly reasonable jacket.

Time to head down to the start line - isn't this just the absolute most beautiful view ever? Love this park. Miles of groomed, lit trails for running, biking, and skiing.

Here's everyone all lined up and ready to go - love how many people were out there with their kids, all dressed up for a race on a random Tuesday night. Another race tonight elsewhere in Anchorage had over 300 participants, so lots of runners tonight!

I really love this city. 

Pin It!

Thursday, October 24, 2013

Halloween Wall!


One of my favorite traditions growing up was our family Christmas wall, where my mom would hang an assortment of our artwork and pictures from years past. 

This year I decide to do something similar for Halloween. I put up a bunch of my kids' artwork, along with pictures of them in their costumes throughout the years. I love looking back on my old favorites! I also hung a few of our Ghost Family Portraits, where I'd have my kids draw our family as a family of ghosts. This wall makes me happy every time I look at it!

Pin It!

Sunday, October 6, 2013

Learning a Lesson


My 6-year-old hesitantly teeters onto the ice, his new hockey gear nearly doubling the size of his scrawny body. Surrounded by other boys whizzing by, easily handling their hockey sticks and gear, he falls down immediately. He hasn't been on skates since spring, and I immediately curse myself for not thinking to take him skating a few times in preparation for his first day of practice. He gets up and skates a few feet, and then falls again. Again. Again.

I have to tear my eyes away and I look around the rink, everything as foreign to me as it is to him. I knew there would be other kids in his league who had played hockey before, but I did not expect that out of the 50 or so kids skating around the rink, at least 45 of them would show up with league jerseys already emblazoned with their names. How has every six year old in the city other than mine already been playing hockey? Didn't they all just barely learn to skate? To walk, really?

I check in to see how he's doing. The coaches skate indifferently around the rink, watching but not helping. As the other boys pass to each other as they easily weave back and forth, my son wobbles and falls. Again. Again. Again. He's out there all by himself, and my heart tightens in my chest. I want to skate out there and help him, or at least find a coach to help him. My mind races to predict the first thing he'll say when he finally comes off the ice, discouraged and downtrodden. Everyone is better than me. I kept falling down. I don't want to go back.

The tears spring to my eyes and I can't watch him struggle. He's still skating and falling, skating and falling. Again. Again. He can't stop quickly on his skates and the other boys can. Why didn't we take him to the rink this summer and teach him to stop like that? Why didn't I think of that? I lean against an outer wall and text a friend: This is one of the hardest moments of my parenting career. I can't watch this. I know that to the other moms, watching intently from the bleachers, I look uninvolved and disinterested, but if I watch him fall down one more time, I will cry. I check my watch. Ten minutes down. Fifty to go.

My daughters want to play outside, and even though I brought them to support their brother in his first practice, I jump at the chance to leave my husband in there to watch alone. I enjoy some rare fall sunshine, I take deep breaths. We can all do this. My son loves sports with every fiber of his being - this will be our life now. If not hockey, something else. There will be more (many more) moments of heartache, watching him struggle and not being able to help. It'll just be my job to encourage him, take him for some extra practice skate sessions, and cheer my heart out for him.

We head back inside. He has his feet under him a little better now, and they're in small groups of about 8 doing drills. He glides slowly but confidently between the cones. There is nothing about his body language to suggest that he is discouraged or defeated.

They end with a game of Sharks and Minnows, and even though he's been on the ice for 57 minutes now, he is still skating as fast as he can, giving it his best. Our school nurse, who is one of the coaches, is screaming his name, encouraging him along, and my younger daughter keeps giving him a beaming, proud, thumbs-up. Tears prick my eyes again. I'm a little emotional.

When he comes off the ice and takes off his gear, I hurry to meet him. What is he going to say? Everyone but me had a jersey from last season. They all know how to play and I don't. I fell down so many times. I don't want to go back. I hesitantly round the corner to where my husband is helping him change back from hulk child to regular child. He is nothing but smiles. And sweat. His hair sticks straight up, and his eyes are bright. "I love hockey!" he crows. I exhale.

Later that night he snuggled me happily. "Thank you for paying for me to do sports," he told me. "I love hockey so much." "I'm so glad. I loved watching you play," I lied told him.

That night he is an example to me. It doesn't matter to him that literally every single one of the 50 kids out there was better than him, because he was doing what he loved and wanted to learn. He wasn't discouraged that he kept falling down - he didn't even mention it. He had to have fallen over a hundred times, and it was like he didn't even notice. My son is determined. He doesn't care about what the other kids were doing. He was confident. Joyful. He knows he will improve and I know it too. And in the meantime, I'm going to try harder to be more like my kid.


Pin It!

Sunday, September 29, 2013

Easy Minion Costume!

We had a community Halloween event in September this year, so we got a nice early start on costumes! We decided to do a group "Despicable Me" costume this year with our cousins, and I think it turned out great! Here is our group shot:

Here were the girls' costumes. We just got everything out of their closets, with a few creative additions (such as the 10-year-old wearing an old 5T green blazer I knew I had down in our crawl space). My youngest wasn't about to wear the overalls and yellow striped tee-shirt Agnes usually wears, so we went with ballerina Agnes. Let's just say it was a loose interpretation.

I thought I'd post a quick how-to on making the minion costumes. They were so cheap, and relatively easy to do!
First we ordered yellow beanies off Amazon. I think they were about $4 each. We also bought the yellow tee-shirts from Michael's for $3 each. The glasses were an AWESOME find (also at Michael's) for only $1! We were looking for "nerd glasses" because we thought that would be close enough. Not sure what these glasses were supposed to be for, but they sure worked well for minions, and you can't beat $1!

For the shirts, we took some denim fabric we had, cut a rectangle and two strips to look like overalls, and then just stitched them down with a quick zig-zag stitch. We didn't even turn the edges under, because we figured these shirts wouldn't get used more than two times. We thought we were done with the shirts, but the kids kept asking about the "G" logo, so I went ahead and cut one out on my Silhouette onto some vinyl and stuck it to the shirt. I'm not fancy enough to do iron-on yet, so I literally just slapped some vinyl on there. Again, I'm not planning on these lasting forever. Then the boys wore jeans, and a long-sleeve tee-shirt under. Black gloves optional in your neck of the woods. :)

For the hats, I took black pipe cleaners, cut them in half, and just stuck them through the beanies. I did all the hair a little bit different. My son specifically wanted his all close together, like Kevin, because I guess Kevin is the tallest minion and my son is very proud that he is the tallest cousin. LOL. Here is a pic where you can see the hair a little bit better.

Unfortunately our event had nothing but POURING rain, so I didn't get the best pics of the minion costumes, but I'll try again on Halloween. In the meantime, hopefully this at least gives you an idea of how we did ours!


Pin It!

Sunday, September 15, 2013

Website Review: Diet Bet


This is not a sponsored post in any way - I just wanted to introduce you to a website you may not have heard of, and let you know my thoughts and experience.

In March, I was so happy to reach what I had planned to be my goal weight. But.... I got lazy, summer happened, and by the end of my summer vacation I had gained 7 pounds. I needed to do something - I am only 5 feet tall, so every pound is visible on my body.

I read about Diet Bet, and I was intrigued. People start challenges, with a buy-in amount they set between $10 and $500. The leader of the challenge also chooses the start date, and then participants have 28 days to lose 4% of their body weight. For me, that was a little over 5 lbs. Definitely a manageable amount to lose in a month, but not an easy amount. Then, at the end of the challenge, everyone who lost 4% splits the pot.

You weigh-in and weigh-out with very specific procedures that involve taking full-body (obviously clothed) pictures and weighing in on a digital scale with a "Word of the Day" written on a piece of paper. Then your pictures and entries are verified by Diet Bet employees, and you may be randomly selected for further verification, such as doing a Skype weigh-in.

For me, this was a great set-up. I loved knowing that I wasn't competing against anyone other than myself. I love fitness challenges because I'm super competitive and highly motivated by winning money, but some challenges are hard for me because I'm small. For people significantly bigger than me, it's easier to lose larger amounts of weight. So this challenge was great, because as long as I stayed dedicated, I could win my money back (and hopefully more!), and it had nothing to do with anyone else. I have no idea what the average percentage is for winners versus losers, but I personally entered a contest with a $25 buy-in and won $40. So I got my money back, plus just a little more.

What do you think? Anyone else think something like this would work for them? The only thing I didn't like about this was that I didn't know anyone else doing it, so I'm hoping to get some buddies to join the next one I do, which will be in October. I'm thinking about this one from Jillian Michaels.

Pin It!

Wednesday, August 28, 2013

Diamond Candle Giveaway!


Let me paint you a picture.... by the light of a flame.... You walk into a store and veer into the candle aisle. You are enticed by "Peaches and Cream" and "Vanilla Sugar Cookie," and find yourself lifting off the glass lids to try each and every one. After hotly debating the merits of fruity candles versus nature-scented candles with your sister or friend, you select the Vanilla Sugar Cookie. You take it home, eager for it to fill your home with its magical scent.... but sadly, it only smells like smoke and wax. The only time you ever enjoy the smell of Vanilla Sugar Cookie again is when you stick your nose right inside that candle.

Has that ever happened to you? Or just me? Time and time again I've been disappointed with a candle I think is going to smell amazing, only to find that it doesn't smell at all while I'm actually burning it.

When Diamond Candles contacted me about a giveaway, I was intrigued by the concept: In each candle, there is a ring inside. Most are worth around $10, but they can be worth up to $5,000. While I was interested in the ring, I wondered if maybe.... finally.... this would be the candle that smelled amazing the entire time I was burning it.

And guess what? It was. I chose the Vanilla Lime scent, and my entire family commented on the fantastic scent first day I started burning it (and several more times after that). "Is that a soy candle?" my husband asked. (Yes.) How does he know these things?

My kids were eagerly involved in the process of burning down to the ring. Every day they begged to burn the candle so we could get close enough to get the ring out, and when we finally unwrapped it, they were practically elbowing each other in the face trying to be the first one to see the ring!
Ooooh..... Ahhhhh.....
Wanna see the ring that came with mine? While there are all different styles posted by customers on the Diamond Candle Facebook page, I really liked the one that came with my candle. It had a yellowish stone in the middle, with diamond-looking stones all around it. If you want to trade your ring, there's also a Diamond Candle Trade page on Facebook (not affiliated with the Diamond Candle website). You can also check out pictures of the rings on Pinterest or Instagram.
Have to wear the ring on my middle finger because my fingers are freakishly small. :(


Waiting for the candle to burn down to the ring made me think of childhood memories of the prizes in boxes of cereal and Cracker Jacks, and the anticipation was really fun. However, my primary reasons for purchasing one in the future would be for their outstanding quality, fast shipping, and amazing scents. They also have customer reviews on their website, which I always appreciate. My husband and I were both impressed by the quality of the candle and the smell, and we will definitely be repeat customers! I think next time we'll go for Cinnamon Roll, Lavender Lemon, or Apple Slice. Check out their website and see which scents appeal to you!

Diamond Candles has offered one of our readers their own free candle (includes shipping!). Enter below!

a Rafflecopter giveaway

Note: I was provided with a Diamond Candle in exchange for my honest opinions about their product.

Pin It!

Thursday, August 15, 2013

Easy Homemade Lip Gloss Tutorial!

So yesterday my 7-year-old asked if we could start planning her birthday party, which is coming up in a few weeks, and I told her no, since I hadn't blogged my lip gloss recipe from her birthday party last year. Seems reasonable, right? Not to her, apparently. So I guess I'd better get going.

Need a simple, fun craft for a birthday party or a rainy day? Here is the absolute EASIEST way to make homemade lip gloss.

I was inspired by the most at Meet the Dubiens, but needed something easier for the format of a birthday party. My daughter was having a pajama party/spa night-themed party, and I wanted the girls to make the lip gloss themselves for a craft. Pretty much every recipe out there I've seen involves heating a bowl full of Vaseline. Hmmmm... sounded kind of unsafe to have around a bunch of sugared-out 6-year-olds, and also not as interactive as I'd like a birthday party craft to be.

So this was our solution....

We decided to spoon the Vaseline into little Ziplock baggies ahead of time. I got small containers, so we only did a little bit of Vaseline in each one (maybe two or three of these spoonfuls - see picture of filled bags below). I think we let each girl do two or three flavors.
Here we go.... all ready for the party guests!

First, the girls held their baggie in a bowl of warm water. They need to hold it there until the Vaseline melts. And, uh, this is my own daughter doing one of our practice rounds. I did not have all our party guests sit on the counter next to bowls of hot water. Only the best for my kids.

Then, open it up and sprinkle some powdered Kool-Aid in there. We had all the different flavors of Kool-Aid in little bowls, and just had the girls put a few pinches of the Kool-Aid in their bags.

We found that adding a little drop of water to the powder sort of "activated" the color and made the color of the lip gloss much more vibrant.

After that, have the kids squish the Kool-Aid and Vaseline together until they are well mixed.

Finally, cut a small piece off the corner of the Ziplock and squeeze the lip gloss into your container of choice (no mess!). We got these in the beading area of Michael's, and they had several sizes to choose from. We went with small ones so that the girls could make several. Let the girls decorate with stickers, if desired!
Here's how they looked in the gift bags with the other party favors - so cute!
The girls LOVED this craft, and the lip gloss actually tasted pretty good! And, after cleaning the Vaseline off of that one spoon, I was suuuuuuuuper glad I didn't have a big bowl of Vaseline to clean out. So, enjoy!

I guess I'll give up hope on Google Reader ever coming back. Have you done this yet? -->Follow my blog with Bloglovin


Pin It!

Tuesday, August 6, 2013

Day After Day

The picture of exhausted motherhood....
Do you ever look around at the dirty dishes in the sink and piles of toys, paper, and clutter around your house, and think, "Being a mom kind of sucks sometimes." Because I do, and then I hate myself for it. I know that I'm blessed to have children, and so fortunate to have a career where I get to be home with them for three months out of the year while still making a living wage. But I am telling you...

It seems like everything I do all day just gets undone, either gradually or immediately, but that there is nothing that lasts. Do the dishes, then they're back. Do the laundry, then it's overflowing again. Pick up the downstairs, turn around and step on more clutter. The kids make their beds, then drag all the bedding onto the floor to build forts. And I started to think, "This is pointless. Nothing I do matters. I have to do it all again and again and no one even cares."

I found myself thinking longingly about my job, and the freshness of it all. I would think resentfully, Well, at least at WORK when I do something, it doesn't immediately come undone. I can teach my students something, create in my classroom, collaborate with a co-worker.... and in the morning? It's all still done. I can see those students years from now and the impact I made, the things I taught - those things last.

But then I realized something. The things I do as a mother are enjoyable, and they do last. The part that drives me crazy? It's just housekeeping. My new summer mantra - "I hate housekeeping. I love mothering."

And really? It's the same thing at school. I love teaching, but the housekeeping at my work drives me crazy too. Every single weekend there are lesson plans to write. I have to submit grades for every student, every subject, every week (blech!). I have report cards, progress notes, etc. Every August I complete the hideous task of writing a schedule for my services, every March I have to make up groups for our standardized testing. Those are the housekeeping tasks of my job, and I do hate them. They are repetitive, sometimes hard, and sometimes I feel it will never end.

At home the dishes, laundry, cleaning, etc. - same thing. Repetitive, sometimes hard, seemingly never-ending. But just housekeeping.

The things that I do as a mother? Those things do last. I did an Afternoon Adventure with my kids every single day. We went to the park, we did science experiments, we did nature scavenger hunts.
 We spent time with family and had new experiences.
We bought kids' kayaks and all my kids learned to use them (even my 3-year-old!). (And even me!)
We traveled.
We took long rides on the paddleboat and talked about life.
And I got to be there for all of it. So even though I still hate cleaning with a passion, and resent that there is no cleaning fairy to help me with ten thousand loads of dishes and laundry, I cannot let myself get bogged down in thinking that that is what motherhood is all about. My joy in motherhood has nothing to do with my home, and everything to do with hanging out with these three beautiful, kind, hilarious little people. And they are awesome. Now let's get them going on the ten thousand loads of laundry, and then we'll really have a deal.

Pin It!

Monday, August 5, 2013

How to Speak Kid: Ending the Clutter Guilt

How many items of clothing can they wear at once?
It's pretty widely agreed-upon in the world of organization that holding onto things out of a sense of guilt is not a good idea. But how often do we say to our kids something like, "You can't get rid of that! Aunt Amy bought that for you for your birthday and you haven't even worn in yet!" or, "I gave that to you for Christmas and you've barely even played with it!"

Stop and think - do we want to convey to our kids the message that they should hang onto things just because of guilt? Isn't that a habit that many of us are actively try to break?

As adults, things should be in our homes because we love them and use them. Difficult as it might sometimes be, this is a lesson I'm trying to teach my kids from the time they are young. Then, hopefully, when they are adults, it will spare them the guilt-induced anxiety of agonizing whether or not to keep the hideous cat sweater just because it was a gift from grandma.

The last time I went through my 7-year-old's closet with her, we made a deal. I held up each and every article of clothing, and she either said "Good" or "Done." "Done" could mean that it doesn't fit anymore, it's not comfortable, she doesn't like it, whatever. She doesn't need to explain it to me. At first this was hard for her to get used to. "It's just itchy around my neck," she'd say regretfully, looking up at me with big, anxious eyes. "Don't worry!" I kept assuring her. "You can get rid of stuff you don't want anymore. You don't have to explain it to me. If you don't love it and wear it, I don't want you to keep it." She also gets a lot of hand-me-downs from her cousin, some of which are really nice, but just not her style. She doesn't need to keep those. She doesn't need to keep gifts that she doesn't play with, clothes that are uncomfortable, toys that she's outgrown, or anything she doesn't use and love.

Obviously if you have a child constantly begging you for things and then not wearing or using them, you'd need a different plan. But I don't even mind getting rid of something that one of my kids begged for every once in a while. Have you ever bought something you really loved at the time, only to find that you didn't really like it after all? Or someone asked if you were pregnant when you wore a certain dress, or it didn't fit right, etc.? I try to give my kids the same allowances. Maybe she really did love the Hello Kitty shirt when she begged for it, but then someone in her class said only Kindergarteners wear Hello Kitty. Maybe the swimming suit looked really cute to her at the time, but the stitching was terribly itchy. It's okay. It's okay as adults to get rid of things we don't use and love, and it's okay for kids to get rid of things they use and love. Getting rid of it is no more wasteful than letting it sit there, unused. If anything, it's less wasteful because someone else can be using it.

So next time you're going through your kid's room with them, think carefully about the messages that you're conveying about their possessions. Think about your own goals and attitudes about clutter and organization, and the ways we all wish we were better. Maybe, hopefully, with some understanding and grace, we'll get a generation that won't grow up afraid to get rid of the cat sweater. Maybe someday I will be so brave.

Pin It!

Saturday, August 3, 2013

This is Actual Life

So this kid is hilarious. She's my youngest, and she's famous for being kind of a foodie. She loves spices, sauces, meat, veggies, pretty much anything. But one thing she does NOT enjoy is melted cheese. Weird, right? She can't handle a quesadilla unless she dips it in boatloads of salsa, and grilled cheese is a no-way for her. What kind of a kid wolfs down curry but won't eat grilled cheese? This one.

So the other night I was feeling tired, lazy, and sick of cooking dinner. I decided to make nachos, thinking I would be such an awesome mom. As I set her plate in front of her, she reminded me that she does not like melted cheese, "except the fluffy kind." What in the world does that even mean? Three-year-olds are crazy.

The awesome part is that she informed me that while she doesn't mind "fluffy" melted cheese, whatever that is, she will eat "flat" melted cheese, whatever that is. Lucky for me, she apparently doesn't know the difference between fluffy cheese and "flat" cheese. So for each chip, she would hold it up and ask me, "Is this fluffy cheese or flat cheese?" I'm no dummy - they were all flat cheese. A total miracle. Not one chip on her plate had fluffy cheese, so she ate every single last one. Dipped in boatloads of salsa, of course. :)

Pin It!

Tuesday, July 30, 2013

How-Tuesday: How to Make Tissue Paper Pom Poms


I know these cute tissue paper pom poms (or flowers, whatever you want to call them) have been around for a long time, but it never fails that when I use them to decorate for a party, someone asks me how to make them. So I figure there are at least a few people out there who could use a tutorial!

First, start with a stack of 6-8 sheets of tissue paper. You can do all the same color, or alternate colors.
 Then, fold it accordion-style (about an inch for each fold)...
 Then, trim the ends, either to a rounded shape, or a pointy tip.
 Take some wire and wrap it around the middle to secure it, and then slip a ribbon through. Trust me, it's MUCH easier to attach the ribbon before you fluff it all up! (Not that I would ever have made that mistake or anything...) You can also use fishing line, but I like the ribbon for that extra pop of color.
Once you've got it secured, fan the edges apart and start pulling up the tissue paper, starting from the top. Alternate first one side, then the other, moving down through half the sheets. So, if you layered 6 sheets of tissue paper, pull 3 of them up. Pull VERY carefully, as these can rip, and pull them all the way up to the middle.

 Then, do the same thing on the other side, so they're pulled apart from each other.

Then, fluff the layers gently back toward each other, and arrange them until you have the look you want.
 The one on the left had the pointy tips, and the one on the right the rounded ones.
 You can hang these, as seen here...
 ...or just leave them as a table decoration.
These are pretty flexible, so experiment a little! You can cut the tissue paper in half to make smaller ones, buy larger tissue paper, layer 12 sheets instead of 6, make multi-color ones, or wherever your creativity takes you! But whatever you do, don't buy the overpriced Martha Stewart kits for these. They are super simple and fun to make!

Pin It!